Biting into a perfectly executed homemade version of the iconic Reeses peanut butter cups recipe reveals a masterclass in American confectionery, where the structural snap of tempered milk chocolate yields to a salty, slightly granular peanut butter core. Originating in the 1920s in Hershey, Pennsylvania, this dish relies entirely on the interplay between fat stability and sugar crystallization; success is dictated by the precise ratio of Milk Chocolate, Creamy Peanut Butter, and Confectioners' Sugar to ensure the filling doesn't liquefy and the shell doesn't bloom. By mastering the emulsification of the nut butter and the temperature control of the cocoa solids, you create a confection that surpasses the commercial original in both depth of flavor and textural integrity.
Quick Reference
| Field | Detail |
|---|---|
| Dish | Reeses Peanut Butter Cups (Homemade Confectionery) |
| Origin | American (Hershey, Pennsylvania) |
| Hero ingredients | Milk Chocolate, Creamy Peanut Butter, Confectioners' Sugar |
| Defining technique | Tempering and Enrobing |
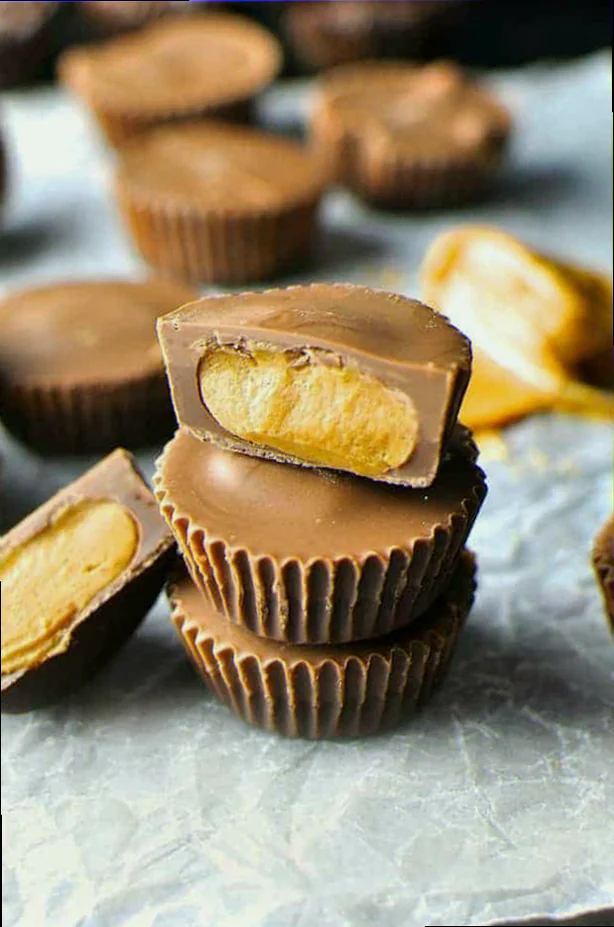
| Texture | Snap (chocolate) and Gritty-Smooth (filling) |
| Flavour | Salty-Sweet, Roasted Nut, Cocoa-forward |
| Total time | 60 minutes (including chilling) |
| Servings | 12 regular-sized cups |
| Pairs with | Cold Whole Milk or a Dry Irish Stout |
| Occasion | Halloween, Holiday Gifting, or Dessert Platter |
Ingredients - What Actually Matters and Why
In the architecture of a peanut butter cup, the Milk Chocolate serves as the structural foundation, requiring a high cocoa butter content for a clean break. The Creamy Peanut Butter acts as the flavor engine, providing the necessary lipids, while the Confectioners' Sugar is the textural modifier-it absorbs the excess oil from the peanuts to create that signature "short" or crumbly texture that defines the authentic experience. Without this specific sugar, the center remains a liquid sauce rather than a stable puck.
- Milk Chocolate - 340g (12 oz) high-quality chips or chopped bar - The vessel: provides the "snap" and provides a sweet, creamy contrast to the salt.
- Creamy Peanut Butter - 250g (1 cup) - The core: provides the protein and fat base; use a stabilized commercial brand rather than "natural" oil-separating varieties for the best structural results.
- Confectioners' Sugar - 65g (1/2 cup) sifted - The stabilizer: binds the peanut oils and creates the characteristic slightly gritty, firm texture.
- Unsalted Butter - 30g (2 tbsp) melted - The emollient: adds a silky mouthfeel to the filling and helps it hold its shape when bitten.
- Sea Salt - 1/4 tsp fine grain - The enhancer: cuts through the sugar to highlight the roasted notes of the legumes.
- Graham Cracker Crumbs (Optional) - 30g (1/4 cup) finely ground - The textural secret: adds an extra layer of "crunch-grit" common in the original commercial formula.
Method: Tempering and Enrobing Step by Step
The sequence of operations is designed to create a reinforced chocolate shell that encapsulates a stabilized nut-butter core, ensuring the two entities remain distinct even at room temperature.
- Liquefy - Melting the Chocolate: Place two-thirds of the milk chocolate in a heat-proof bowl over a simmering water bath (double boiler) at 45°C until the solids disappear into a glossy, fluid pool.
- Seed - Stabilizing the Crystals: Remove from heat and stir in the remaining third of the cold chocolate chips; whisk constantly until the mixture cools to 30°C and appears thick and lustrous, indicating the cocoa butter has reached a stable crystalline state.
- Coat - Creating the Base: Spoon 1 tablespoon of tempered chocolate into the bottom of paper-lined muffin tins; use the back of the spoon to drag the chocolate 1cm up the sides until the paper is obscured by a thin, even layer.
- Chill - Setting the Shell: Transfer the tin to the refrigerator for 10 minutes until the chocolate feels firm to the touch and has a dull, matte finish.
- Emulsify - Mixing the Filling: In a separate bowl, whisk the peanut butter, melted butter, salt, and sifted confectioners' sugar (and graham crumbs if using) until the mixture loses its oily sheen and forms a soft, pliable dough that can be rolled into a ball without sticking to your fingers.
- Compress - Inserting the Core: Roll 1 tablespoon of the peanut butter mixture into a disc and press it gently into the center of each chocolate shell, ensuring there is a small gap between the filling and the edges of the chocolate wall.
- Enrobe - Sealing the Cup: Spoon the remaining tempered chocolate over the peanut butter discs; tap the tin sharply against the counter 3-4 times to level the tops and remove trapped air bubbles until the surface is flat and reflective.
- Finish and plate: Chill for a final 20 minutes; once set, the cups should peel away from the paper liners effortlessly, revealing a ridged edge and a perfectly smooth, dark-tan surface.
Authentic vs Adapted: What Changes and What Doesn't
The "authentic" Reeses peanut butter cups recipe, as perfected by H.B. Reese in 1928, is technically a triumph of industrial food science, utilizing specific emulsifiers like TBHQ and soy lecithin to maintain shelf stability. When we adapt this for the home kitchen, we move away from chemical stabilizers in favor of mechanical ones. The traditional version uses a very high ratio of sugar to peanut butter to achieve a "dry" interior that doesn't soak into the chocolate. In this adaptation, we maintain that non-negotiable "short" texture by using confectioners' sugar and graham cracker crumbs, but we upgrade the exterior to high-quality milk chocolate. What must never change is the salty-to-sweet ratio; an unsalted peanut butter cup loses the primary flavor profile that defines the American confectionery tradition. While you can adapt the chocolate type (using dark or white), the soul of the dish resides in that specific granular peanut interior.
Substitutions That Work (and Ones That Don't)
- Milk Chocolate → 70% Dark Chocolate: This increases the bitterness and provides a firmer snap; it is a highly recommended upgrade for those who find the original too cloying.
- Creamy Peanut Butter → Almond Butter: This softens the texture significantly; you must increase the confectioners' sugar by 2 tablespoons to compensate for the higher oil content of almond butter.
- For dietary needs - Vegan: Use a dairy-free chocolate and swap the butter for a coconut oil-based vegan butter; do not use liquid oils (like canola) as the filling will not set firm.
- Budget swap - Generic Store Brand Chocolate: This often contains more paraffin wax or vegetable oil than cocoa butter. The impact is a "waxy" mouthfeel and a failure to temper properly, resulting in a cup that melts instantly in your hands. Stick to brands where cocoa butter is the primary fat.
What to Serve Alongside Reeses Peanut Butter Cups
These confections belong to the "Salty-Sweet" Knowledge Graph cluster, making them ideal partners for crunchy, savory snacks. Serve them on a board with sourdough pretzels and sharp cheddar cheese slices to provide a textural and acidic contrast to the rich chocolate. For a more decadent occasion, pair them with a fudgy brownie or a salted caramel tart, as the nuttiness of the peanut butter bridges the gap between cocoa and burnt sugar. Regarding beverages, the classic pairing is a glass of ice-cold whole milk, which cleanses the palate of the sticky peanut fats. However, for an adult pairing, a Dry Irish Stout or a coffee-infused Porter works beautifully; the roasted malts and bitterness of the beer mimic the roasted notes of the peanuts and balance the high sugar content of the confectioners' sugar.
Troubleshooting: Why Your Peanut Butter Cups Went Wrong
Symptom: The chocolate has white streaks or is soft at room temperature. This is caused by a failure in the tempering technique. If the chocolate was heated too high or cooled too slowly, the cocoa butter crystals became unaligned (Bloom). Fix: You must re-melt the chocolate and "seed" it with fresh, tempered chips to reset the crystal structure.
Symptom: The peanut butter filling is oily and leaking out. This indicates an imbalance in the emulsification of the filling, likely from using "natural" peanut butter without enough binder. Fix: Whisk in an additional 1-2 tablespoons of confectioners' sugar or finely ground graham cracker crumbs to absorb the excess lipids.
Symptom: The chocolate shell cracked when you bit into it, or the filling separated. This usually happens if the chocolate layer is too thick or if the cups were frozen rather than chilled. Fix: Ensure the side walls are thin and even during the coating step, and always serve at cool room temperature rather than straight from the freezer to allow the fats to soften slightly.
Make-Ahead and Storage
You can certainly prep this recipe the night before; in fact, the flavors of the peanut butter core often deepen after 24 hours as the salt and sugar fully hydrate within the nut fats. Store the finished cups in an airtight container in the refrigerator for up to two weeks. If you need to store them longer, they freeze exceptionally well for up to three months. To maintain the snap texture, do not leave them in direct sunlight or a warm kitchen (above 22°C), as the milk chocolate will begin to soften. When serving from the freezer, allow them to sit at room temperature for 10 minutes to ensure the peanut butter center returns to its ideal "gritty-smooth" consistency.
Recipe Questions Answered
What makes Reeses peanut butter cups different from Buckeyes?
The primary difference lies in the enrobing technique and the ratio of ingredients. Buckeyes are a midwestern confection where the peanut butter ball is partially dipped in chocolate, leaving a circle of peanut butter visible at the top. The filling for Buckeyes is typically much sweeter and softer (more butter and sugar), whereas a peanut butter cup uses a drier, saltier filling that is completely encapsulated by a thin, ridged chocolate shell.
Can I make Reeses peanut butter cups recipe without a muffin tin?
Yes, though the visual attribute of the "ridged edge" will be lost. You can use a silicone ice cube