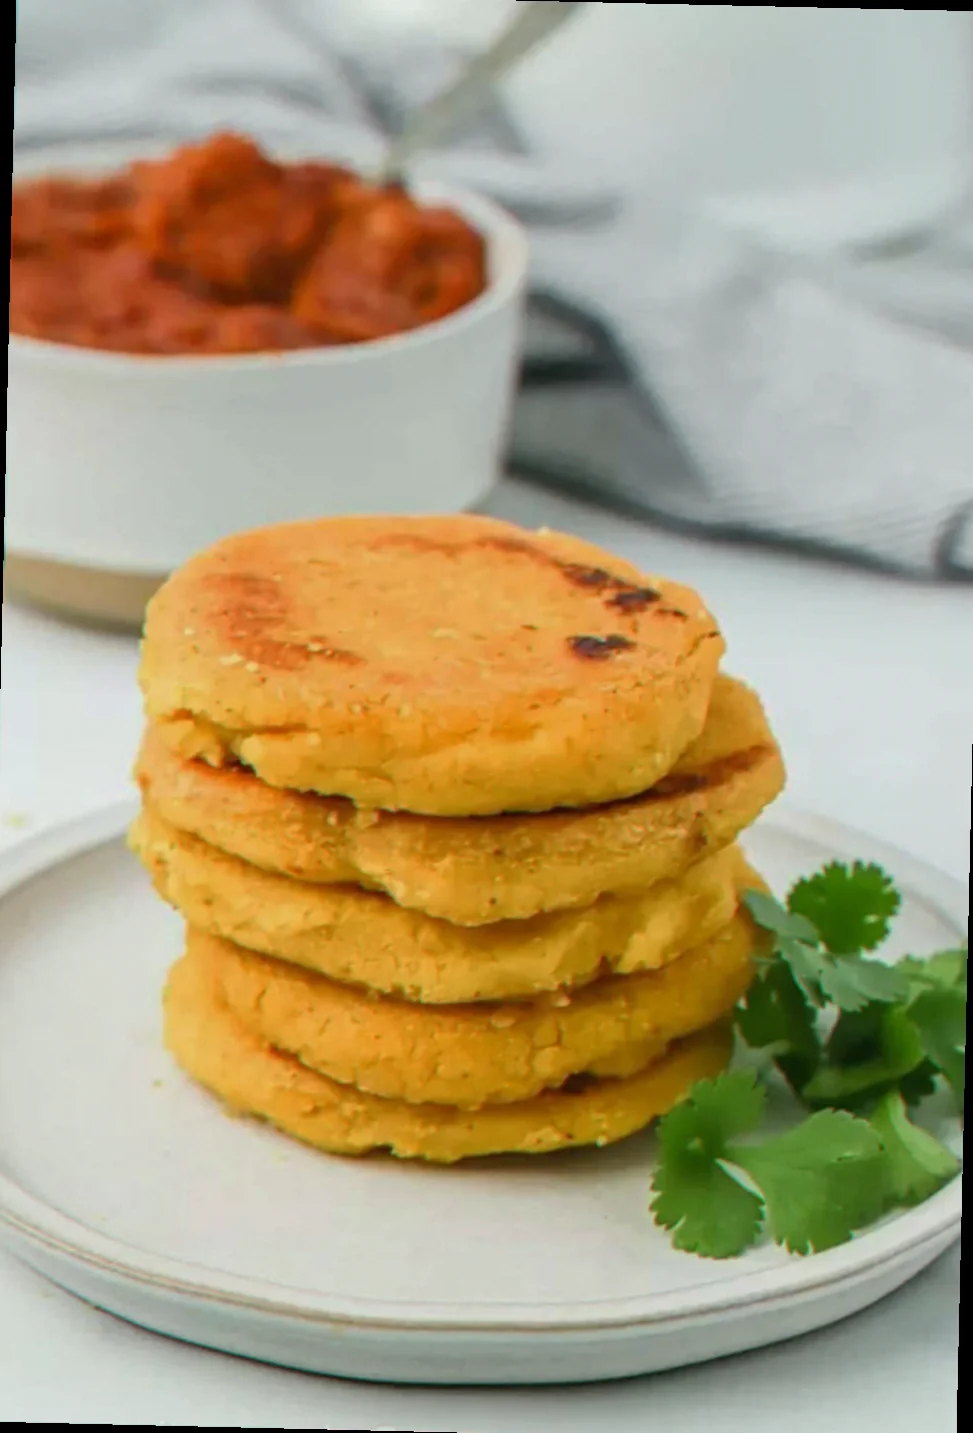
Imagine a golden-brown exterior that crackles with the first bite, giving way to a warm, pillowy-soft interior, subtly sweet and earthy from corn, ready to embrace a myriad of savory fillings. This is the magic of Arepas, the beloved staple of Venezuelan and Colombian cuisine. Mastering them hinges on two crucial elements: achieving the perfect hydration for the dough, which dictates that ideal crispy-fluffy texture, and the two-stage cooking process that develops their signature golden crust.
Quick Reference
| Field | Detail |
|---|---|
| Dish | Arepas |
| Origin | Venezuelan & Colombian cuisine (Andean region) |
| Hero ingredients | Harina P.A.N. (pre-cooked white corn flour), Water, Salt |
| Defining technique | Griddling |
| Texture | Crispy exterior, Fluffy interior |
| Flavour | Mildly sweet, Earthy, Savory |
| Total time | 40 minutes |
| Servings | 6-8 |
| Pairs with | Cold Pilsner Beer or Passion Fruit Juice |
| Occasion | Breakfast, Brunch, Casual Lunch/Dinner |
Ingredients - What Actually Matters and Why
The beauty of Arepas lies in their simplicity, but don't let the short ingredient list fool you; each component plays a pivotal role in achieving that sought-after texture and flavor. The specific type of corn flour is non-negotiable for its unique starch properties, while precise water content ensures the dough is pliable yet holds its shape, and salt enhances the natural corn sweetness.
- Harina P.A.N. (Pre-cooked white corn flour) - 2 cups - This is the soul of your Arepas. Unlike regular cornmeal, this pre-cooked, finely ground corn flour absorbs water quickly and gelatinizes, creating the distinct chewy yet fluffy texture that defines an Arepa.
- Warm Water - 2 ½ cups - The critical binder. The exact temperature and quantity are crucial for hydrating the corn flour correctly, leading to a dough that is neither crumbly nor sticky.
- Salt - 1 teaspoon - A flavor enhancer. It brings out the subtle sweetness of the corn and balances the overall taste.
- Vegetable oil or butter - 1 tablespoon (for griddling)
Method: Griddling Step by Step
The magic of Arepas unfolds through a two-stage cooking process: initial griddling to form a crust and internal cooking, followed by a final bake or fry to fully cook the interior and develop maximum puff and crispness. This sequence ensures a perfectly cooked Arepa, crispy outside and tender inside.
- Combine - Mix the Dough: In a large bowl, whisk together the Harina P.A.N. and salt. Gradually pour in the warm water, mixing with your hands until a shaggy dough forms. Continue to mix until all the flour is incorporated and there are no dry spots. The dough should feel soft and slightly sticky, not crumbly.
- Rest - Hydrate the Flour: Cover the bowl with a clean kitchen towel and let the dough rest for 5-10 minutes. This crucial step allows the Harina P.A.N. to fully absorb the water, making the dough easier to handle and contributing to the fluffy interior. After resting, the dough should be firm enough to shape but still moist.
- Shape - Form the Arepas: Take a handful of dough (about 1/3 cup) and gently knead it in your hands for a few seconds to smooth it out. Roll it into a ball, then flatten it into a disc about 3/4 to 1 inch thick and 3-4 inches in diameter, with smooth edges. The edges should be even and not cracked. Repeat with the remaining dough.
- Griddle - Sear the Exterior: Heat a cast iron skillet or griddle over medium-high heat. Add a touch of vegetable oil or butter and swirl to coat. Place the Arepa discs on the hot surface, leaving some space between them. Cook for 5-7 minutes per side, until they develop a beautiful golden-brown crust and release easily from the pan. You'll hear a gentle sizzle and see steam.
- Bake - Finish Cooking: Preheat your oven to 180°C (350°F). Transfer the griddled Arepas to a baking sheet. Bake for 15-20 minutes, or until they feel light and sound hollow when tapped. They should puff up slightly and be firm to the touch.
- Finish and plate: Carefully remove the Arepas from the oven. For serving, carefully slice each Arepa horizontally about two-thirds of the way through, creating a pocket. Fill generously with your favorite fillings such as shredded beef (carne mechada), black beans, cheese, or avocado. The perfectly made Arepa is golden-brown with a slightly irregular, rustic edge, generously puffed, and ready to burst with flavor.
Authentic vs Adapted: What Changes and What Doesn't
Authentic Arepas, particularly in Venezuela and Colombia, are traditionally made with just three ingredients: pre-cooked white corn flour (Harina P.A.N. being the most common brand), water, and salt. They are typically griddled on a "budare" (a flat, round griddle, often cast iron) until a crust forms, then finished either by baking in an oven or deep-frying until they puff up. The non-negotiable attributes are the specific type of corn flour, which dictates the unique crispy-fluffy texture, and the two-stage cooking method. While some adaptations might incorporate a tiny bit of oil or butter into the dough for richness, or use a food processor for mixing, these are minor. What fundamentally changes an Arepa's identity would be substituting the Harina P.A.N. with regular cornmeal (which creates a crumbly texture more akin to cornbread) or skipping the critical two-stage cooking process, resulting in dense, uncooked centers or a lack of crispness.
Substitutions That Work (and Ones That Don't)
- Harina P.A.N. → Yellow Harina P.A.N.: texture/flavour impact: Minimal, slightly sweeter and more pronounced corn flavor. Recommendation: Acceptable, but white is classic.
- Water (for dough) → Milk or Broth: impact: Adds richness and a slightly softer texture. Recommendation: Acceptable for a richer flavor profile, but less traditional.
- Vegetable oil (for griddling) → Butter or Lard: impact: Adds more flavor and a richer crust. Recommendation: Highly recommended for enhanced taste, especially butter.
- For dietary needs - Gluten-free: Arepas are naturally gluten-free as long as you use 100% corn flour (like Harina P.A.N.) and ensure no cross-contamination. No exact swaps or method adjustments needed.
- Budget swap: There isn't a true budget swap for Harina P.A.N. as it's a specific product, and other corn flours simply won't yield the same result. It's generally an affordable ingredient, and its unique properties make it worth the investment for authentic Arepas.
What to Serve Alongside Arepas
Arepas are incredibly versatile and can be served as a bread accompaniment or stuffed as a main meal. For a complete Venezuelan or Colombian experience, pair them with other regional delights like Empanadas (crispy fried turnovers, often corn-based) for a diverse street food spread, or alongside a hearty bowl of Pabellón Criollo (shredded beef, black beans, rice, and plantains) to soak up all the rich flavors. They are also excellent with a simple side of fresh sliced avocado and a sprinkle of crumbled white cheese. To complement their mild, earthy flavor, a crisp, cold Pilsner beer is an excellent choice, as its effervescence and light bitterness cut through any richness of the fillings, cleansing the palate. For a non-alcoholic option, a vibrant passion fruit juice provides a refreshing, tart counterpoint.
Troubleshooting: Why Your Arepas Went Wrong
Making perfect Arepas is an art, but common pitfalls are easily avoided with a little knowledge of dough hydration and heat management.
- Symptom: Dough is crumbly and won't hold shape.
Cause: Insufficient water. The Harina P.A.N. has not fully hydrated, leaving the dough dry.
Fix for next time: Gradually add a tablespoon or two more warm water to the dough, kneading it in until it becomes pliable and smooth, holding its shape without cracking when pressed.
- Symptom: Arepas are dense and raw in the center, not fluffy.
Cause: The griddle was too hot, creating a hard crust too quickly, or the baking time was too short. The interior didn't have enough time to cook through and puff.
Fix for next time: Ensure your griddle is at medium-high, not scorching hot, to allow a gradual crust formation. Always finish in the oven at 180°C (350°F) for the full 15-20 minutes, or until they sound hollow when tapped.
- Symptom: Arepas are not crispy on the outside.
Cause: The griddle was not hot enough or the Arepas were not cooked long enough on the griddle. The crust needs direct, high heat to caramelize and crisp up.
Fix for next time: Preheat your cast iron skillet or griddle thoroughly over medium-high heat until a drop of water sizzles instantly. Cook for at least 5-7 minutes per side until deeply golden-brown and firm before transferring to the oven.
Make-Ahead and Storage
Arepas are best enjoyed fresh, but you can certainly prepare components in advance. You can prepare the Arepa dough up to 1 day ahead. Store it tightly wrapped in plastic cling film in the refrigerator. When ready to use, let it come to room temperature for about 15-20 minutes before shaping and cooking. Cooked Arepas can be stored in an airtight container in the refrigerator for up to 3-4 days. To reheat without losing their key crispy texture, split them open, lightly toast them in a toaster oven or on a dry skillet, or even a few minutes in an air fryer at 180°C (350°F) until warmed through and crispy again.
Recipe Questions Answered
What makes Arepas different from Pupusas?
While both Arepas and Pupusas are delicious, griddled corn flour patties, they differ in their origin, preparation,